Showing posts with label cake. Show all posts

FOOD ENVY #7

Do you ever get an overwhelming desire for something... whether that be food related or the "need" to visit a particular place. My current desire is for cake and if you know me you'll know we are not talking about a gateaux or a torte or a heavily iced cupcake... all I want is a simple, moist and spongy pound cake. Boring you say?! Well if that means I can get some pound cake (ideally marble) I don't care if I am boring. ;)

Here are my current favourites and I plan to bake them all... muahahaha! 

Etta xo

  1 // 2 // 3 // 4
For more inspiration, inside and outside the food department, you can follow me here

CHOCOLATE + SUGARED ALMOND CUPCAKES


When I think of funfairs at home in Germany, I think of crazy roller-coasters, of cotton candy, cheesy music, "Lebkuchenherzen" and sugared almonds. Oh it's sugared almonds every time! Lets just dream about German Christmas markets for a little bit, where there's stalls covered in heaps and heaps of sugared almonds. Still hot, they come in large paper cones and you munch on them alongside a steaming mug of mulled wine. Good right? It makes you not feel that bad about summer being over.

Oh and then I came across the lovely Jessica's Sugared Toasted Almond cupcake recipe and I was sold! Only waited for an occasion (my boss Dave's birthday!) and of I went to my little laboratory that is my kitchen to do some yum, yum baking.

You all know I am not a big icing fan, but oh boy this one is out of this world.

Enjoy,
Etta xo

PS Jessica mentions the sponge being quite firm and if you guys love Hummingbird and Buttercup cakes then absolutely use her recipe. They are a little dense for me so I decided to use my classic vanilla sponge recipe next time. 


--------

MAKES 12 cupcakes
PREPARATION 10mins
COOKS 30mins

INGREDIENTS

For the sponge
  • 110g soft butter
  • 110g caster sugar
  • 110g self-raising flour
  • 2 eggs (lightly beaten)
  • 1-2tbsp milk
  • 1tsp vanilla extract 
  • 1tsp almond extract
 For the icing
  • 170g unsalted butter, softened to room temperature
  • 220g icing sugar
  • 45g unsweetened cocoa powder
  • 2 teaspoons vanilla extract
  • 1-2 tablespoons milk, if needed
For the sugared toasted almonds
  • 40g sliced almonds
  • 2 tbsps brown sugar

PREPARATION METHOD
  1. Pre-heat the oven to 180˚C and line a 12-hole muffin tin with paper cases (use cupcake cases not muffin cases).
  2. Cream the butter and sugar until well combined, fluffy and pale (for about 5 minutes). You can either use a whisk, hand mixer or kitchen machine for this. 
  3. Add the eggs a little at a time and mix until you have a smooth batter. Mix in the vanilla and almond extracts.
  4. Fold in the flour. Once combined add the milk a little at a time until your batter is of a thick, dripping consistency.
  5. Spoon the mixture into the paper cases, making sure it is distributed equally.
  6. Place into the pre-heated oven and bake for 12-15 minutes until golden brown. Once done check whether your cakes are cooked by piercing with a cocktail stick. If it comes out clean the cakes are done. If the batter sticks to it, bake for a couple more minutes. Leave to cool completely.
  7. Heat a small pan over a medium heat and add almonds. Toss and stir constantly and toast for 1-2 minutes, just until almonds start to brown. 
  8. Reduce the heat to low and toss in sugar, stirring to coat. Stir constantly and cook for another minute, then remove and place almonds in a bowl. After a few minutes of cooling they will harden and you can break them apart.
  9. In the bowl of your electric mixer, beat the butter on medium speed until creamy. Gradually add in sugar and cocoa powder with the mixer on low, speeding up once combined. Add the vanilla extract and beat on medium, scraping down the sides if necessary, for 2-3 minutes. If your frosting is too thick, add one tablespoon of milk at a time, beating for another minute or two to smooth it out. Repeat if necessary. If frosting isn't thick enough to be spreadable, add a few spoonfuls of powdered sugar while beating until it thickens. Frost and top with sugared almonds below.
These are amazing!! You have to try them. You could make a whole cake of this, just make sure you bake it for about 40 minutes (depending on the size of your cake tin). 

UPSIDE DOWN BERRY + POLENTA CAKES (dairy free)


I've never been one for cooking "anything"-free food. Neither of us are allergic to any ingredients or follow a special diet so the thought of going out of my way to approach traditional recipes the un-traditional way never really occurred to me. Because butter is good you know and so are cream and eggs.

More recently I've been noticing a slight lactose intolerance developing (half my family has it so it makes sense). While I'm still cool with a drop of milk in my tea or coffee, a whole bowl of cereal or a massive portion of ice cream I shouldn't have too regularly. I've started experimenting with milk substitutes for my morning cereal and have gone from hazelnut, over almond, oat and rice milk and ended up with coconut milk. I absolutely love it. If you weren't told you'd never know you weren't drinking cows milk and it makes for a great, refreshing cold drink.

I have toyed with the idea of trying out the Paleo challenge or eating dairy/carb free for a little while and have attempted this a couple of times - unsuccessfully. (trust me I will let you know once I have completed one!)

Naturally, when I came across these dairy free upside down fairy cakes I was dubious. But I love polenta and aren't they just the prettiest.

I thought they were amazing - the perfect combination of tangy and sweet and the ideal afternoon tea treat.

Enjoy,

Etta xo

PS  My cakes turned out a little flatter than the originals so feel free to use bigger cupcake moulds or to fill them up a little more.
------------


Print this recipe
MAKES 24 fairy cakes or a 23cm cake
PREPARATION 5mins
BAKES 20-25mins (fairy cakes) or 1hr (cake)

INGREDIENTS
  • 250ml rapeseed or sunflower oil, plus extra for greasing
  • 300g mixed berries (I used frozen ones, make sure you defrost them thoroughly and remove any excess liquid)
  • 4 large free-range eggs
  • 300g caster sugar
  • 2tsp vanilla extract
  • 250ml Sauternes or apple juice
  • 280g plain flour
  • 2 tsp baking powder
  • 110g polenta 

PREPARATION METHOD
  1. Preheat the oven to 180°C/fan160°C. 
  2. Grease 2 x 12-hole non-stick muffin tins and line each hole with a circle of baking paper. Divide the berries among the holes. Beat the eggs, sugar and vanilla seeds together until foamy. Beat in the rapeseed oil, then the Sauternes or apple juice. Sift the flour, baking powder and polenta over the top and fold in.
  3. Divide the mixture between the muffin holes and bake for 20-25 minutes (or 1 hour for the whole cake), until a skewer comes out clean. 
  4. Leave for 5 minutes, then tip out onto a wire rack and peel off baking paper. These are best enjoyed warm but will keep in an air tight container for a couple of days.

NEW YORK CHEESECAKE + A BBQ TO REMEMBER


So last weekend was the day we've all been waiting for this summer - the yearly WTF BBQ held at the Tuffney Manor in the green suburbs of South West London.

The first time I went for Dave's yearly BBQ my jaw dropped over the beauty of his house and garden. You walk into a pretty terraced house and end up in what you imagine a French cottage set amidst a vineyard in Provence with the air of a shabby chique boutique hotel should look like. I am amazed at all the carefully chosen trinkets and oddities that so clearly have been collected over a lifetime of travelling and searching through markets and antiques shops and that not only reflect Dave's and Jane's personalities but also make their home truly special. While I was surprised to find an old VW beetle in his garden last year, this year it was a set of tube doors and a few vintage underground signs here and there. To put it short - it's all pretty cool!

In true WTF fashion we had a blast to say the least. There were Halloween animal masks and a piglet to go round (courtesy of Supamike) and plenty of inappropriate jokes to last a lifetime. I guess you get the picture looking at all the evidence above.

The Tuffneys, like every year, went all out, with vast amounts of the most delicious meats and salads and a bar of spirits, beers and Pimms to quench the thirst of a whole army. You can get some of the amazing ingredients they used here.

So the whole WTF team brought their little contribution to the party. The two Owls widened our culinary spectrum with a selection of yummy zebra, ostrich and kangaroo burgers straight from Borough Market. Anthony made smokey chipotle and honey chicken wangs - finger-lickingly good is all I say (I see a guest blogpost in the making, recipe and all) and then there was the challenge for Mat and I to make a dessert to impress.

I got a little stressed, as I do, and even set up a cake/dessert Pinterest page of afters that not only tasted and looked good but would also withstand the long and hot train journey from Saaaf East to the other end of London.

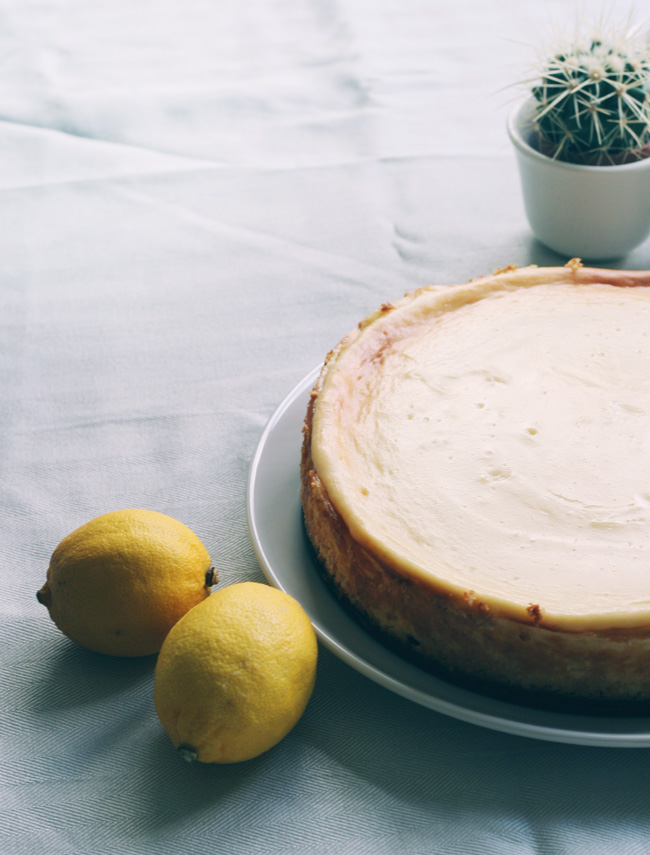
Eventually I settled on a good old New York Cheesecake - which I had never made before, got Mat to make the filling for, because I was too scared I'd muck it up and ended up sitting in front of the oven staring at it hoping it wouldn't crack, or brown or collapse or anything else it wasn't meant to do.

Rest assured it ended up pretty damn good. We replaced the digestives with ginger nuts for extra flavour and added a little lemons zest. Boom - this cake was a winner!!!

Make it, you won't regret it!!!

And on a last note I would like to send a big massive thank you to Dave, Jane and the Tuffney kids for the hospitality and generosity and for making the WTF BBQ a wonderful and unforgettable event.

Etta xo 

PS We also made little polenta upside down cakes which sort of got lost in the whole hype over the cheesecake. They were yum nonetheless and you'll find the recipe on here soon.

Above images by Mikey
------------------


MAKES One 23-24cm cake
PREPARATION 10mins
BAKES 45mins (+ 1-2 hours chilling time)

INGREDIENTS
  • 150g ginger nuts or digestive biscuits
  • 75g butter, plus extra for greasing
  • 900g full-fat cream cheese
  • 200g caster sugar
  • 200ml soured cream
  • 3 tbsp plain flour
  • 3 free-range eggs, plus 1 egg yolk, lightly beaten
  • 2 tsp vanilla extract 
  • zest of 1 lemon
 PREPARATION METHOD
  1. Preheat the oven to 180˚C. Grease and line the base of a 23-24cm spring form cake tin.
  2. Place the biscuits in a plastic bag and crush with a rolling pin to fine crumbs. (If you have a food processor, use that)
  3. Melt the butter and add the biscuit crumbs, stir to combine. Place in the base of the cake tin and spread in an even layer, then flatten using a potato masher or your fingers.
  4. Bake in the oven for 10 minutes until golden. Remove and leave to cool while you prepare the filling.
  5. Reduce the oven to 160˚C.
  6. In a large bowl, beat together the cream cheese and sugar until smooth then add the sour cream and flour and beat again. Gradually add the eggs, vanilla essence and lemon zest beating well between each addition (beat in rather than whisk as you don’t want to incorporate too much air as this will affect the smooth surface of the cheesecake).
  7. Pour the cream cheese mix on to the biscuit base then bake in the oven for 45 minutes. The cheesecake should be just set with a slight wobble and should still be cream on top with just a slight golden hint around the edges. (I had to turn the cake half way through as my oven gets hotter at the back than at the front.)
  8. Once the cheesecake is cooked, turn off the oven and prop open the door so that it is slightly ajar and leave the cheesecake to cool in the oven – this prevents the top from cracking.
  9. Once the oven is cool you can remove the cheesecake to cool completely before removing from the tin.
  10. Leave to completely cool at room temperature, remove from the tin and keep in the fridge until ready to serve.

PEANUT BUTTER + CHOCOLATE CAKE AKA REESE'S PIECES CAKE

Have you seen the name of this cake? It sounds a bit like a dream right? Like a peanut buttery, chocolatey, scrumptious, nom-nom dream. Yup, and so it was.

For years I have avoided buying cup measures, just because I don't get the whole idea of measuring every ingredient I am using with one set of cups, having to wash them each time, rather than using good, old-fashioned grams and milliliters. This means that I missed out on a ton of delicious American recipes. This is how convinced I was not to use cups.

And then it was my colleague Anthony's 30th birthday. I know, big deal, right?! Well, and Anthony luuurves the Reese's Pieces (who doesn't) and I found this amazing chocolate and peanut butter cake recipe and then I succumbed and went and bought cup measures.

I have to say it was so worth it. I usually don't like icing, ever, but this peanut butter icing was so good we ate the leftovers with a spoon and even froze some for... errm... peanut-butter-icing-ice-cream.

As complicated as it all sounds, this cake is pretty easy to make and you can prepare most of it the day before.

What's your favourite birthday cake?


MAKES 1 3-tier 20cm (8") cake (I made a 2-tier, 18cm cake and 12 cupcakes. If you decide to do this, too, note that the cupcakes will only take approx. 15mins to bake.)
PREPARATION 25-30minutes
COOKS 30-35minutes
(you'll need an electric mixer for this recipe)

INGREDIENTS
For the sponge
  • 2 cups all-purpose flour
  • 2 1/2 cups sugar
  • 3/4 cup unsweetened cocoa powder
  • 2 teaspoons baking powder
  • 1 teaspoon salt
  • 1 cup neutral vegetable oil (I used sunflower oil)
  • 1 cup sour cream
  • 1 1/2 cups water
  • 2 tablespoons distilled white vinegar
  • 1 teaspoon vanilla extract
  • 2 eggs
 For the icing
  • 285g (10 ounces) cream cheese, at room temperature
  • 115g (4 ounces) unsalted butter, at room temperature
  • 5 cups icing sugar, sifted
  • 2/3 cup smooth peanut butter
  • 150g grated dark chocolate

PREPARATION METHOD
  1. Preheat the oven to 175˚C.  Butter the bottoms and sides of three 8" (20cm) round cake tins. Line the bottom of each pan with a round of baking or waxed paper and butter the paper.
    Note: If you don't have 3 cake tins (or 2 in my case), or an oven big enough to accommodate all tins, you can bake one layer at a time. It takes a little extra time but the hassle is 0.
  2. Sift the flour, sugar, cocoa powder, baking soda, and salt into a large bowl. Whisk to combine them well. Add the oil and sour cream and whisk to blend. Gradually beat in the water. Blend in the vinegar and vanilla. Whisk in the eggs and beat until well blended. Scrape down the sides of the bowl and be sure the batter is well mixed. Divide among the prepared cake tins.
  3. Bake for 30 to 35 minutes, or until a wooden toothpick inserted in the center comes out almost clean. Let cool in the pans for about 20 minutes. Invert onto wire racks and let cool completely. Note: this cake is super soft and springy and I found it easier to keep the baking paper on until the last minute. If you have enough space, ideally place them into the fridge until you're ready to ice. 
  4. While your sponge is cooling, beat the cream cheese and butter in a large bowl with an electric mixer, until light and fluffy. Gradually add the icing sugar, 1 cup at a time, mixing thoroughly after each addition and scraping down the sides of the bowl often. Continue to beat on medium speed until light and fluffy, 3 to 4 minutes. 
  5. Add the peanut butter and beat until thoroughly blended.
  6. To frost the cake, place one layer, flat side up, on a cake stand or large serving plate. Spread 2/3 cup of the peanut butter frosting evenly over the top. Repeat with the next layer. Place the last layer on top and frost the top and sides of the cake with the remaining frosting. Note: Make sure you crumb your cake first to avoid any bits of sponge showing in your frosting. If you've never iced a cake before this video is great! 
  7. Leave the iced cake to cool in the fridge for a couple of hours or overnight. Cover with the grated chocolate and serve.
 All I can say now is - AHAMAAAZING!!!


SUPER EASY LEMON DRIZZLE CUPCAKES


It's time again… for cakies of course.
Another bosses' birthday was more than an excuse to get the butter, sugar and eggs out and make little goodies of deliciousness.
I made simple lemon drizzle cupcakes this time round. They're perfect with a nice cup of tea, as a picnic or BBQ dessert and the ideal little cake for summer. The oozy lemon curd centre and fragrant sprig of lemon thyme just add that extra little something to it.
Oh and you can get this done in under half an hour. Just amazing :)

MAKES 10-12
PREPARATION 10mins
COOKS 15-20mins
...................

INGREDIENTS
  • 100g self raising flour
  • 100g caster sugar
  • 100g soft butter
  • 2 eggs
  • 1tsp vanilla essence
  • zest of 1 lemon
  • 1tbsp poppy seeds
  • lemon curd
  • 50g icing sugar
  • juice of 1 lemon
  • a few lemon thyme sprigs

PREPARATION
  1. Preheat the oven to 180˚C and line a cupcake tin with 12 small or 10 medium liners.
  2. Beat the sugar and butter together until pale and fluffy. Mix in the vanilla essence and the eggs, one at a time until well combined. 
  3. Fold in the flour, a third at a time until your batter is smooth and silky. Then mix in the poppy seeds.
  4. Spoon half the mixture into the cupcake tin and then top with 1/2-1 tsp of lemon curd. Finish off by filling up the paper liners with the remaining batter.
  5. Bake in the preheated oven for 15-17 minutes or until your cakes are golden brown and a cocktail stick comes out clean when inserted.
  6. Once done, place on a wire rack and leave to cool for 15-30 minutes.
  7. Mix the icing sugar and lemon juice until you have a smooth paste.
  8. Brush the icing over the cupcakes and top with a small sprig of lemon thyme.
And that's it... so simple and so yummy. Best consumed with, of course, a nice cuppa.

Enjoy!


MINI VICTORIA SPONGES

Believe it or not, when it comes to sweet things I am pretty good. I can live without chocolate, sweets, caramels... etc. My only vice is cake. If there's a lovely, moist sponge cake going, I will eat it... ALL!!!

My boss Mikey shares my love for a simple sponge cakes and a few months ago I baked these lovely mini victoria cupcakes for his birthday. And because they were so good we had them for our afternoon picnic in the park this weekend again.

These are so easy to make and because the ingredients are all equal measures you can learn the recipe by heart and bake anywhere, any time :) Here's to all of you who say you can't bake!

Enjoy the vanilla cupcakes just on their own or fill with whatever tickles your fancy or if you want to make a chocolate sponge cake, just sieve a tablespoon of cocoa into the batter, mix and bake. These are absolutely divine.


MAKES 12
PREPARATION 10mins
COOKS 12-15mins
...................

INGREDIENTS 

For the sponge
  • 110g soft butter
  • 110g caster sugar
  • 110g self-raising flour
  • 2 eggs (lightly beaten)
  • 1-2tbsp milk
  • 1tsp vanilla extract
For the filling
  • raspberry or strawberry jam (you can also use fresh berries)
  • 100ml whipping cream
  • 1tsp vanilla extract
  • 1tsp icing sugar
Extra icing sugar to dust.

PREPARATION METHOD
  1. Pre-heat the oven to 180˚C and line a 12-hole muffin tin with paper cases (use cupcake cases not muffin cases).
  2. Cream the butter and sugar until well combined and fluffy. Add the eggs a little at a time and mix until you have a smooth batter. Mix in the vanilla extract.
  3. Fold in the flour. Once combined add the milk a little at a time until your batter is of a thick, dripping consistency.
  4. Spoon the mixture into the paper cases, making sure it is distributed equally.
  5. Place into the pre-heated oven and bake for 12-15 minutes until golden brown. Once done check whether your cakes are cooked by piercing with a cocktail stick. If it comes out clean the cakes are done. If the batter sticks to it, bake for a couple more minutes.
  6. While your cakes are baking, pour your cream into a mixing bowl, add the sugar and vanilla extract and beat until thick. Place into the fridge to cool.
  7. When your cakes are done, place them on a wire rack and leave to cool approximately half an hour. 
  8. To fill, cut little cones out of the top and cut off the pointed tip so that you are left with a sponge lid. Spoon a little of the jam into the cupcake, top with cream, place the sponge lid on top and dust with icing sugar.
Devour with a cup of tea or sparkling wine, ideally on picnic blanket in the sunshine.

Enjoy!


CUSTARD & SUMMER FRUIT CAKE


When it comes to cake I’m the kind of girl who will go for the simple sponge rather than the double cream chocolate fudge cake. Don’t get me wrong, there’s nothing wrong with cakes, creamed and iced to oblivion. However, nothing beats a moist sponge cake, especially when paired with creamy custard and fresh summer fruit. And that is why I ended up making this cake twice in one week.
Although not the most attractive piece of baking it was a real hit with everyone at work and generally anyone who tried it. - When it came to round two, it ended up being the mister’s birthday cake… and he was well chuffed, having it for breakfast, lunch and dinner (because you’re allowed to have cake for every meal on your birthday ;))
You will have to try this. It’s the ultimate spring/summer cake and lends itself perfectly for picnics and barbecues.

MAKES 1 CAKE
PREPARATION 20 mins
COOKS 90 mins

………………………………………


INGREDIENTS
  • 300ml ready made custard
  • 300g fresh or frozen berries (defrosted), you can use any berries you like, blueberries, blackberries, raspberries or cherries
  • 250g unsalted butter
  • 250g caster sugar
  • 4 large eggs
  • 250g plain flour
  • 2tsp baking powder
  • 125ml milk
  • 4 tbsp brown sugar
PREPARATION METHOD
  1. Preheat the oven to 180˚C. Grease and line a 23cm/9inch round cake tin.
  2. Mix half your crushed berries into the custard until well combined.
  3. In a separate bow or food mixer, beat the butter and sugar until creamy. Now add the eggs, one by one until smooth and mixed thoroughly.
  4. Stir in the flour, baking powder, milk, and the remaining crushed berries.
  5. Pour half the mix into the cake thin then add the custard on top. Make sure you leave a 2cm edge around and only pour the custard in the middle. Now top with the remaining cake mixture.
  6. Sprinkle with the brown sugar and bake for 90mins. The baking time can vary slightly depending on your oven. Check by inserting a wooden skewer into the middle. If it comes out clean it’s done.
  7. Make sure you leave your cake to cool for about 1 hour. I mean seriously, leave it… don’t try to take it out or you’ll break it (yep, I did that).
Once cool, remove from the tin and demolish, with a nice cuppa of course. Yuuum!

Custard and Summer Fruit Cake recipe taken from Simon Rimmer and adapted by Etta.